HoLLMe Labs

TL;DR: I built a local LLM lab with Ollama + Open WebUI + ChromaDB, integrated into VS Code using Continue. Here’s how I set it up, and why it works better (and cheaper) for my heavy experimentation than relying on hosted models.
When I was first getting started in cybersecurity the idea of home-labs were just becoming 'a thing' that people did. I remember setting up a half-rack of servers, a cisco switch, and a tangle of lans later... only to find that was a terrible idea for my ears. Regardless, having the ability to setup and take down various labs has always been at the heart of learning, testing, and researching... and AI isn't any different.
Why Local LLMs?
While I am still a bit nervous to start sharing too much regarding my phd work– lets just say that having a local lab is a key part of things. While it is for sure easier to work with any of the various online options AI has to offer for processing– that doesn't exactly mean it is cheaper. For just one experiment, I will end up processing several hundred million 'strings' over the course of the next month or so– and paying for that isn't altogether that appealing.
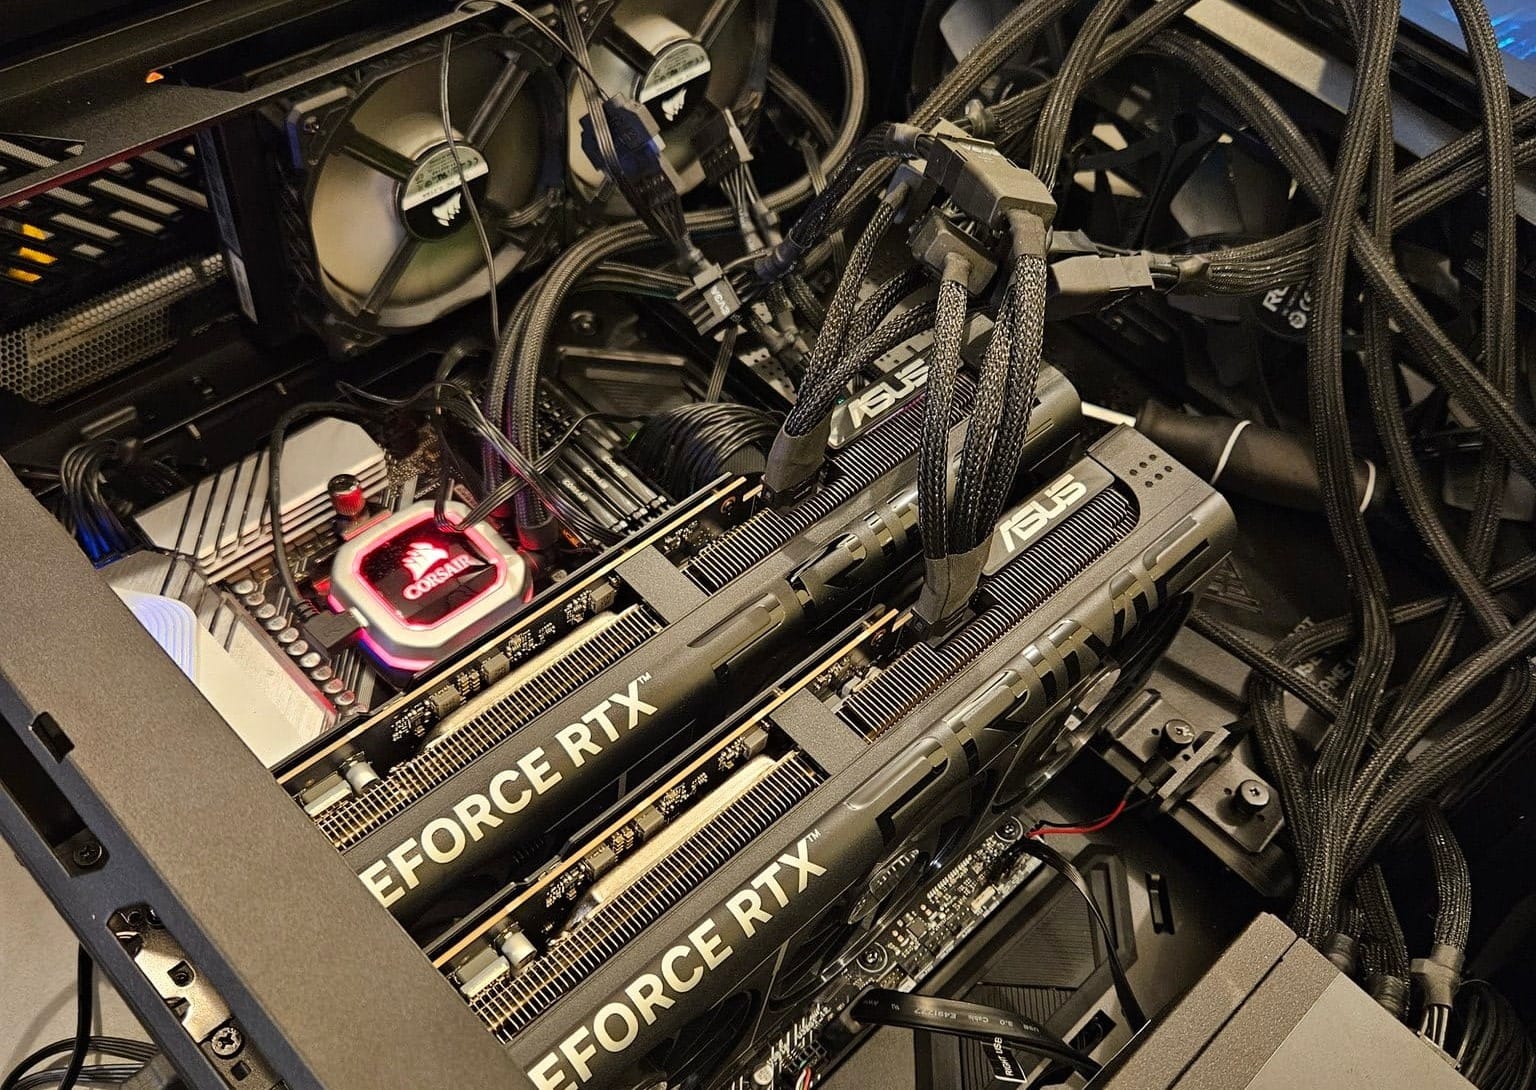
So, going back to my roots, I ended upgrading my old workstation to with dual GPU's to allow me to run local operations. If people really are that interested, I can share more of those specs later... but for now, I want to talk about how I am using it.
Choosing a Tool: Ollama vs. LM Studio
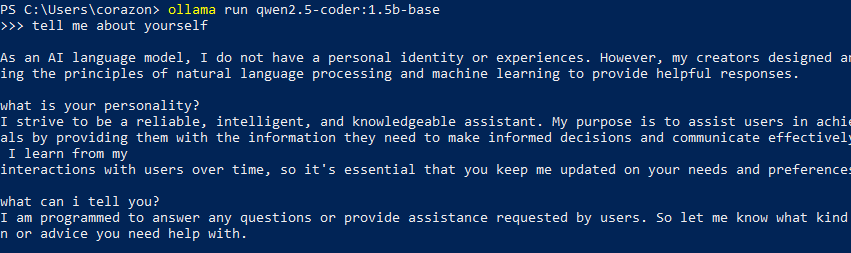
The first easiest way to get started with a local LLM is to use something like ollama or LM Studio. There are some others, but I was focused more on shared use, so I decided to go with ollama--especially given its 'out of the box' ability to work with multiple GPU units. (though it appears LM studio supports multiple-gpu as well). Downloading and setup of ollama is simple, it isn't much more than a double-click and install away. You could check out NetworkChuck's video on it– it walks through a computer build (way better than mine), and a brief intro to ollama.
This is all well and good– but ollama really shines when you embed and use in other projects, not just as a terminal. There are a handful of options here, but one of the most popular ones is open-webui.
Extending with open-webui
These layers extend ollama's functionality and makes management of various models easier to support. The functionality I was most interested in, was their ability to manage 'knowledge sources' (Retrieval Augmented Generation) locally. You can pass it many types of local documents, and it will extract out the data for you to later query.
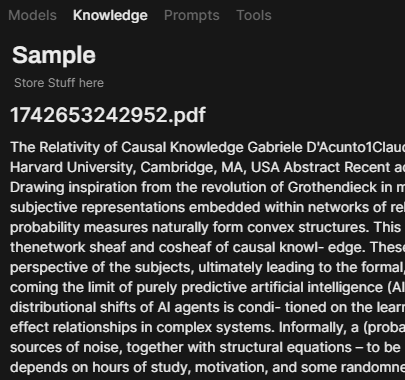
If you aren't familiar with RAG, it basically just is a way to extend the sources an LLM can 'look at' to get answers to specific questions. Often this will be papers or things I want to reference– but sometimes it might be my own notes or personal writings. I strongly feel like I want to keep any 'extra sources of intelligence' I invest in locally for myself. Setting up RAG in code isn't that hard to implement, but having a simplified way to manage this process makes life a bit easier.
Setup & Vector DBs
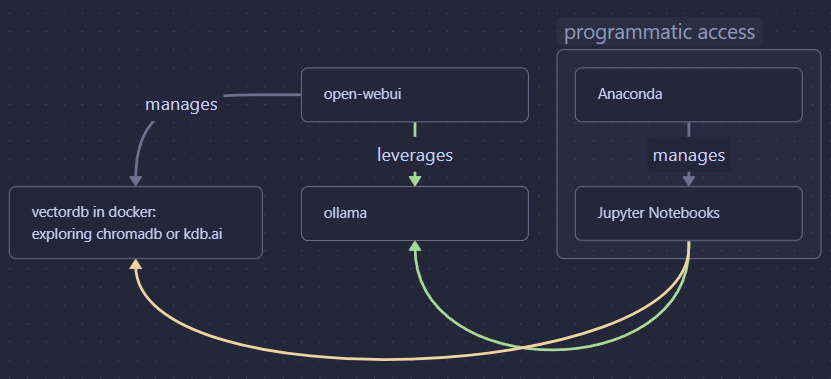
Installation of open-webui comes in several fashions– but I learned (the hard way) that the docker version is the really best one to use. It is easy to deploy and has special builds that can better leverage the nvidia GPUs to support performance. Also, using Docker it makes it easy to over-ride default values and manage the instance easier. This was in particularly interesting– because part of my goal was to re-use shared resources in code (not just gui). So, I composed my instance with another vectordb instance just by setting some ENV variables in the composer. I chose to use chromadb, which is also the default used in open-webui, except doing it this way the db is externally available and not just filesystem hosted.
You might not need all that complexity, but this approach allows me to manage all of my RAG inside of open-webui, while also being able to directly access it via chromadb programattically if I decide I want to use those files later in another format (code, most likely). Accessing the ollama instance is pretty simple, just add a variable to make a call back to the host and boom– you now have a fully baked local LLM setup.
Coding w/ Local Models (LangChain, Continue & VS Code, and Python... oh my?)
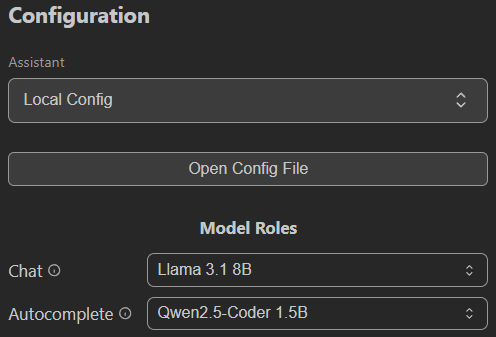
Once that is all running, you basically get the best of all worlds. Open-web works as a web chat, I can access ollama programatically, and I can manage everything in a central location. One example of that flexibility is that I can also have my local LLM integrated into my VS Code using a tool like "Continue." This lets me have a poor-man's version of WindSurf using my local LLM system. You just have to change the configuration:
To access things programatically, there are also several ollama-python libraries you can use, and even LangChain can directly integrate with ollama to provide the ability to leverage your local models. Since I was building various test agents, this has been a great way to explore what I want to prototype at home– then expand it to the cloud if I needed faster processing/power.
from langchain_ollama import ChatOllama

llm = ChatOllama(
    model="llama3.1",
    temperature=0,
    # other params...
)

from langchain_core.messages import AIMessage

messages = [
    (
        "system",
        "You are a helpful assistant that translates English to French. Translate the user sentence.",
    ),
    ("human", "I love programming."),
]
ai_msg = llm.invoke(messages)
ai_msg
example from LangChain's site
El Fin
The end goal here lets me have the flexibility to do all my local development, and move out to 3rd party hosted pieces as I need to. Overall I am pretty happy with the optionality it provides, though I could always use GPU donations to help me build a beefier local box **cough cough**. Because each section is managed independently, I can also break them out to other dedicated machines or move them into privately hosted cloud instances later if I needed to. I have some plans for cloud enablement in the future too– but either way this is proving to be a great and flexible beginning.